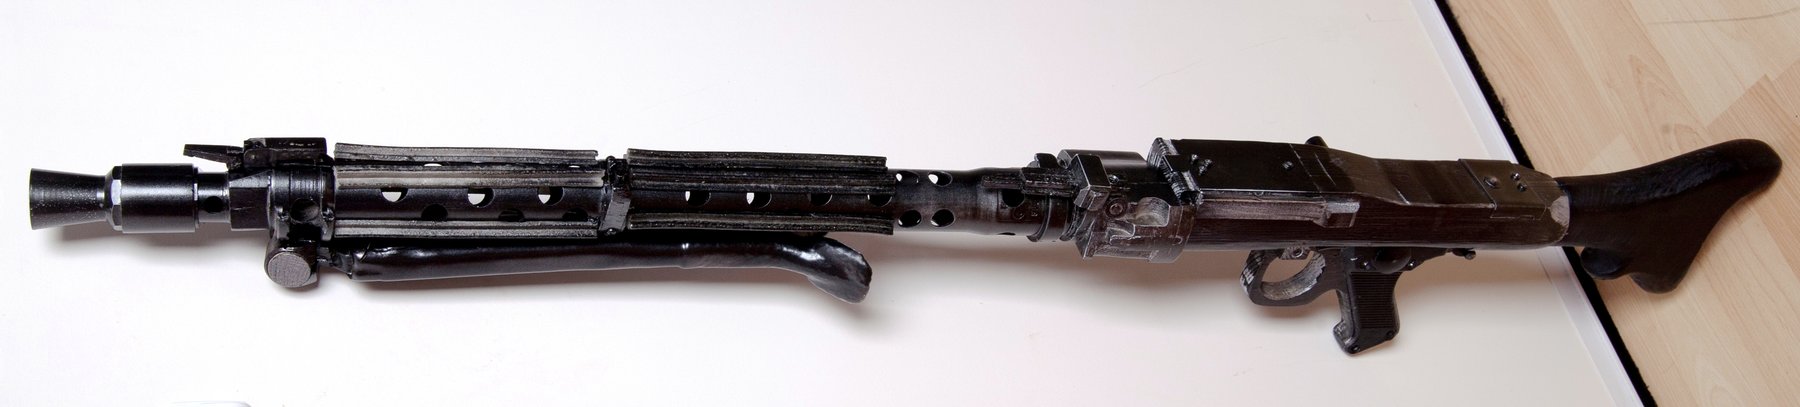
DL-44 "Heavy" Blaster · Volume 7
Sub-Assemblies & Greeblies — Scope, Mount, Flash Hider, Grips
Contents
This volume is the shop-floor reference for the four primary DL-44 sub-assemblies — the scope, the scope mount, the flash hider, and the grips — plus the secondary details (sights, magazine box, trigger group). Each section gives the screen-prop reference, the construction options, the dimensions where they’re known, and the trade-offs across build paths.
Where Vols 4-6 covered “how do I build the whole DL-44 via path A/B/C”, this volume covers “how do I make / source / fit a specific sub-assembly”. Builders mixing paths (e.g. Path B Denix donor with a Path C-machined custom scope mount) live here.
7.1 Sub-assembly overview
| Sub-assembly | Screen-prop reference | Path A (donor mod) | Path B (parts) | Path C (scratch) | Vol section |
|---|---|---|---|---|---|
| Scope | Hensoldt-Wetzlar Ziel-Dialyt 3× | Real Ziel-Dialyt or substitute | Real, repro, or 3D-printed | Repro tube + machined caps | § 7.2 |
| Scope mount | Custom saddle, two-screw | Made (lab) or bought | Bought or made | Made (lab) | § 7.4 |
| Flash hider | MG-15/MG-81 (debated) | Real WWII or bought repro | Bought or 3D-printed | Machined (lab) | § 7.3 |
| Grips | Custom smooth dark wood | Made (lab) or bought | Bought or made | Made (lab) | § 7.5 |
| Sights | Preserved C96 ramp | Preserved | Preserved (kit) or sculpted | Machined | § 7.6 |
| Trigger / hammer | Preserved C96 internals | Preserved | Cosmetic only | Cosmetic only | § 7.7 |
| Magazine box | Preserved C96 box | Preserved | Cosmetic | Cosmetic | § 7.8 |
7.2 The scope — Hensoldt-Wetzlar Ziel-Dialyt 3×
7.2.1 What it is
The Hensoldt-Wetzlar “Ziel-Dialyt” is a commercial sporting / target telescopic sight produced by Carl Zeiss subsidiary Hensoldt at their Wetzlar, Germany factory, primarily in the 1920s-1940s era. It is not a German military-issue scope — Wehrmacht sniper scopes used different designations and were typically more specialized. The Ziel-Dialyt was sold to civilian target shooters, hunters, and (informally) for surplus modification onto various rifles.
Key features:
- 3× magnification (fixed) — modest, suited to the sub-100 m target ranges these scopes were designed for.
- Tube length approximately 200 mm / 7.9″.
- Tube diameter approximately 25 mm / 1.0″ at mid-tube, with a gentle taper from the larger objective end to the smaller eyepiece end.
- Adjustment turrets in the interwar-German style — knurled drums with index marks for windage and elevation, with screw-on caps to protect the adjustments.
- Reticle — simple crosshair, no rangefinding ladders or stadia.
- Markings — “Ziel-Dialyt” on the side of the tube, with the Hensoldt-Wetzlar maker mark (lens-shaped logo or text “HENSOLDT WETZLAR”).

7.2.2 Identifying a real Ziel-Dialyt
When sourcing a real scope:
- The “Ziel-Dialyt” name is the canonical identifier. Period Hensoldt also produced other scope lines (Dialytan, Diavari, etc.) — the Ziel-Dialyt is specifically what the prop used.
- Production era is 1920s-1940s. Pre-WWII production is more common in the antique market than wartime production.
- Condition matters less than originality for a prop build — a scope with scratched optics is fine; a scope that’s been “restored” with non-original parts is less ideal.
7.2.3 Sourcing the scope
- German collector markets — egun.de, online German auction sites. Best inventory; language barrier and shipping complexity.
- eBay (US and international) — periodic listings; varies by month. Search “Hensoldt Ziel-Dialyt” or “Hensoldt Wetzlar scope”.
- Specialty antique-scope dealers — Numrich and similar firms occasionally have period scopes; check.
- GunBroker — surplus dealers periodically list period European scopes.
Price: $200-800 for a serviceable Ziel-Dialyt, depending on condition and provenance. Pristine specimens with original turret caps and matching-numbers between tube and adjustments command premium.
7.2.4 Substitute scopes (visually similar)
If a real Ziel-Dialyt isn’t available or in-budget:
- Other Hensoldt scopes of similar era — Dialytan, Diavari, etc. — share the silhouette.
- Other German manufacturer interwar scopes — Voigtländer, Schmidt & Bender (earlier production), Zeiss-Jena. All share the broad form factor.
- Russian / Soviet PU sniper scopes — visually different (shorter, different turrets) but used by some budget builders as an approximate substitute.
- Modern Chinese reproduction scopes of European period styles — quality varies wildly; a good one is “close enough at 3 m viewing distance”.
7.2.5 Reproduction scope (Path C from-scratch)
For a from-scratch build the scope can be reproduced rather than bought:
Materials:
- 1″ OD aluminum tube, ~210 mm length.
- 6061-T6 billet for end caps.
- Two smaller aluminum cylinders for the windage / elevation turret drums.
Operations:
- Lathe-turn the tube to the slight taper (slightly larger at objective end).
- Lathe-turn the end caps — eyepiece (smaller, with a focus-ring detail) and objective (larger, with the lens housing detail).
- Lathe-turn the turret drums — small knurled cylinders with index marks (engraved via laser).
- Mill the turret mounting bosses onto the tube body.
- Assemble — tube + end caps + turret drums + dummy lenses (clear acrylic discs).
- Engrave “Ziel-Dialyt” and “Hensoldt-Wetzlar” markings on the side of the tube via the 100 W laser.
- Finish — matte black paint, anodize, or Cerakote.
- Age — light handling wear, edge burnishing.
A reproduction scope is a 20-30 hour sub-project — substantial but manageable. The aged result at 3 m viewing distance is indistinguishable from a real Ziel-Dialyt.
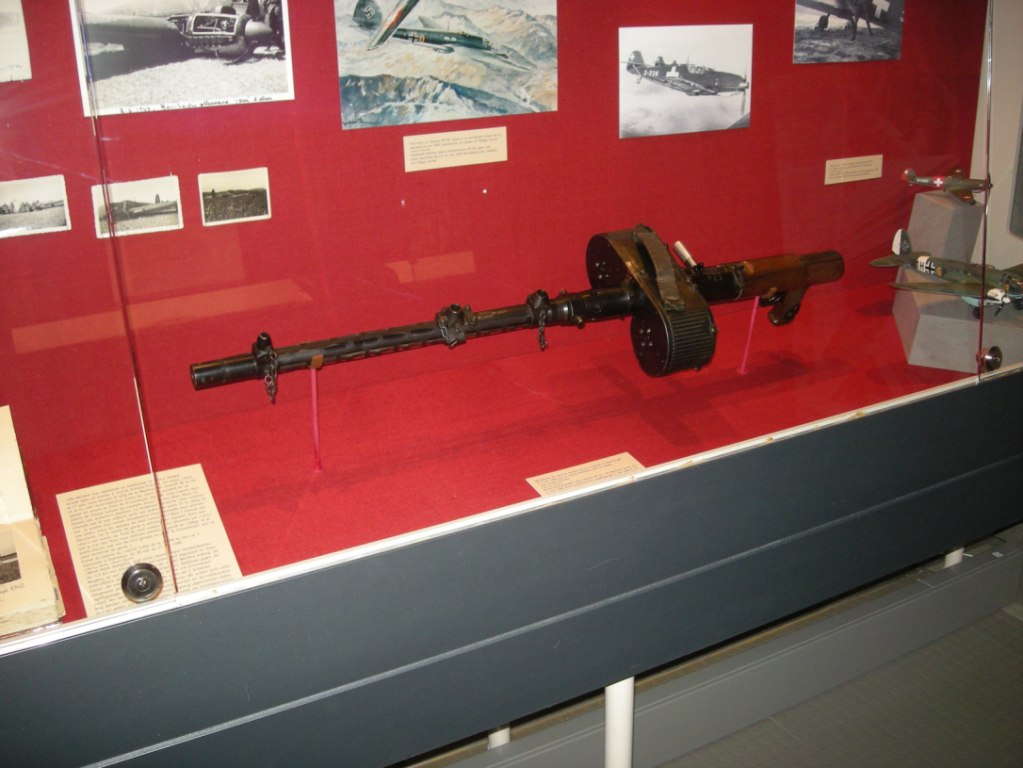
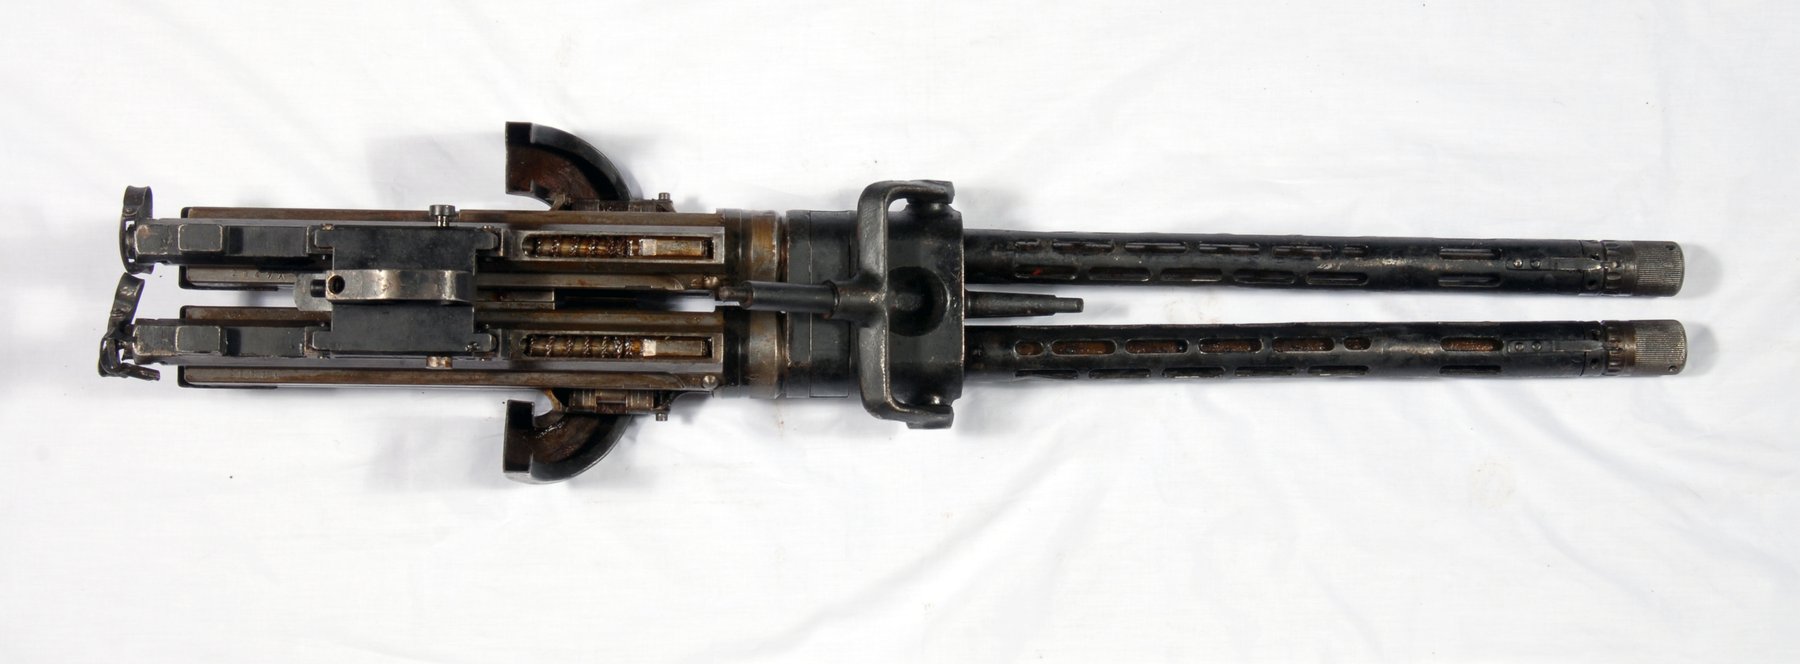
7.3 The flash hider — MG-15, MG-81, or MG-34?
7.3.1 The debate
The DL-44’s flash hider is community-debated between three candidates:
- MG-15 — 1930s German aircraft observer’s machine gun, replaced operationally by the MG-81 in the early 1940s.
- MG-81 — successor to the MG-15, used in late-WWII German aircraft. Faster firing.
- MG-34 — the standard German army general-purpose machine gun of WWII.
All three weapons had flash-hider / muzzle hardware with a similar aesthetic: fluted longitudinal external profile, cooling slots / holes around the OD, flared trumpet-shaped end. Visual differences exist but are subtle on the screen prop where motion blur and lighting hide detail.
Evidence for each:
| Donor | Evidence for | Evidence against |
|---|---|---|
| MG-15 | Period of availability matches (surplus available post-WWII when ANH was made); silhouette and flute count visually close to some screen frames | Some prop analysts note the screen prop’s flute spacing is wider than typical MG-15 |
| MG-81 | Visually very close to MG-15 (same family); period available; some flute proportions match better | MG-81 muzzle hardware less common in surplus; harder to confidently match |
| MG-34 | The MG-34 was the most-produced of the three — most surplus available to a UK prop department in 1976; the standard German army weapon makes “prop sourced from surplus” plausible | The MG-34 flash hider proportions are subtly different from screen prop in side-by-side analysis |
This series presents the debate without resolving it. A builder can pick any of the three donors and produce a defensible DL-44.
7.3.2 Real WWII muzzle-hardware sourcing
- German militaria dealers (US and German) — periodic availability of MG-15/MG-81/MG-34 muzzle hardware. Check IMA-USA (International Military Antiques), various German militaria sites. $80-300 typical.
- Surplus dealers — Aimsurplus, RTG Parts, and similar have intermittent stock.
- gunbroker / auction houses — periodic listings, vetted-provenance preferred.
7.3.3 From-scratch flash hider (Path C)
Materials:
- 1.0″ OD round stock — 6061-T6 aluminum (lighter, easier finishing) or 4140 steel (heavier, more authentic feel).
- ~100 mm length per piece (the flash hider itself is ~85-95 mm; allow extra for setup).
Operations:
- Lathe-turn the OD profile — basic cylinder with slight outward taper toward the flared end.
- Lathe-bore the ID — fit the C96 muzzle (or scratch barrel) outer diameter, slip-fit.
- CNC-mill the longitudinal flutes — three or four flutes equally spaced, ~3-5 mm wide, ~1-2 mm deep.
- CNC-mill or laser the cooling holes — small round or oval holes along each flute, 5-8 holes per flute, ~3 mm diameter.
- Drill the cross-pin hole for retention to the barrel.
- Lathe-turn the flared trumpet end — outward flare in the last 15-20 mm of the OD.
- Finish — parkerize (most-authentic WWII military look), hot blue (alternative), or Cerakote matte black.
- Age — soot stains around the muzzle exit, handled-wear high points.
A from-scratch flash hider is a 6-10 hour sub-project. The flutes + cooling holes operation is where the laser can substitute for additional mill setup if positioned correctly.
7.3.4 Replica flash hider sources
- DL-44 replica makers on RPF marketplace — periodic vendor listings, $50-200.
- 3D-print STL files — community-shared models on Thingiverse, Printables, and RPF. Print in PETG (PLA softens too easily). Quality depends on the model and slicer settings.
7.4 The scope mount
7.4.1 What it is
A custom-machined saddle that bolts to the top of the C96 receiver, supporting the scope above the bore axis. Identifying features from the screen prop:
- Saddle / cradle shape that wraps around the bottom-half of the scope tube.
- Curved bottom profile to mate with the C96 receiver’s slightly contoured top.
- Two mounting bores in the bottom, threaded for screws into the receiver.
- Height ~32-38 mm centerline-of-scope above receiver top (varies slightly by piece).
- Material — steel on most reference photos; aluminum possible on some pieces.
7.4.2 Dimensions (community-canonical)
| Dimension | Approximate value | Notes |
|---|---|---|
| Mount overall length | ~75 mm | Front-to-back |
| Mount width (top of saddle) | ~30 mm | Slightly wider than scope tube diameter |
| Mount height (top of saddle to bottom contact) | ~32-38 mm | Varies; ANH hero ~35 mm |
| Saddle ID (matching scope tube) | ~25 mm | Match the actual scope tube OD |
| Bottom contour | C96 receiver top curve | Hand-fit to specific receiver |
| Mounting bore spacing | ~50 mm | Center-to-center |
| Mounting bore size | ~M4 or 8-32 UNC | Tapped into receiver |
7.4.3 Path A — mount fitment to a real C96
For a real-donor build:
- Test-fit a non-final mount blank to verify the bottom contour matches the specific receiver.
- Mark the mounting hole positions on the receiver — use the mount as a transfer punch.
- Drill and tap the receiver (see Vol 4 § 4.4.2 for the hole-position cautions).
- Mount with the chosen screws + thread-locker.
- Verify scope alignment — the scope should sit centered and parallel to the bore axis.
7.4.4 Path C — mount machined from scratch
Single-setup CNC part:
- Stock: 6061-T6 aluminum or 4140 steel rectangle, ~80 × 35 × 40 mm.
- Setup: fixture the bottom flat to the mill table, top up.
- Mill the saddle profile — round pocket on top to fit scope tube OD.
- Mill the side profiles — narrow the mount’s width where the saddle is.
- Drill the mounting bores through the bottom — threaded or clearance per design.
- Re-fixture for the bottom contour — mill the bottom curve to match the C96 receiver top.
- Finish — Cerakote, blue, or parkerize per the build’s overall finish.
A from-scratch mount is a 3-5 hour sub-project — easy compared to other parts.
7.4.5 Pre-made replica mount sources
- RPF marketplace — multiple vendors offer DL-44 scope mounts; $50-200 depending on material and quality.
- DL-44 kit-builders — the kit-builder package (Path B1) typically includes the mount.
7.5 The grips
7.5.1 What they are
The DL-44 hero grips are smooth wood panels replacing the C96’s factory checkered grips. Visible features:
- Smooth surface — no checkering, no grooves.
- Dark wood — walnut or rosewood, oil-finish suggesting a darker stain or natural wood color.
- Standard C96 grip frame fit — the grip frame geometry is universal across most C96 variants.
- No visible markings on the hero piece.
7.5.2 Dimensions (standard C96)
| Dimension | Approximate value | Notes |
|---|---|---|
| Grip panel length (top to bottom) | ~95 mm | Standard C96 |
| Grip panel width (at heel, widest) | ~26 mm | Standard C96 |
| Grip panel width (at top, narrowest) | ~18 mm | Tapers narrower at top |
| Grip panel thickness | ~6-8 mm | At thickest |
| Heel lug recess | ~5 mm | For grip-frame heel lug |
| Screw hole | One per panel | Or one through both panels into heel lug, depending on variant |
7.5.3 Path A / B grip sources
- Replacement production C96 grip panels — Numrich Gun Parts (gunpartscorp.com), Empire Arms — typically arrive checkered, can be sanded smooth. $30-80 per pair.
- Aftermarket smooth grips — periodic availability from C96 specialty vendors. $40-100.
- Custom-made grips by replica makers — RPF marketplace, $50-150.
7.5.4 Path C — custom CNC-cut grips
Materials:
- Walnut or rosewood blank, ~100 × 30 × 10 mm per panel.
- Alternative: birch / maple / cherry for a lighter wood (less screen-accurate but easier to source).
Operations:
- Lay out the panel profile on the blank — pencil trace or CNC fixture indexing.
- CNC-mill the outside profile — the curved outline of the panel.
- CNC-mill the back-of-panel pocket — where the grip frame’s grip-panel-recess fits.
- Drill the screw hole at the standard C96 position.
- Hand-sand to final smoothness — start at 220 grit, progress to 400 grit.
- Apply oil finish — Tru-Oil (Lincoln) or Tung Oil. Multiple coats, light sanding between.
- Apply handling wear — light surface scratches, a few small dings, slight darkening at the palm-side.
A pair of grips is a 3-5 hour sub-project. Two panels can be cut from a single 200 mm blank with careful nesting.
7.5.5 Polymer / 3D-printed grips
For budget builds or quick prototypes:
- 3D-print in PLA or PETG — printed grip panels with a wood-look paint or wrap.
- Cast in pigmented epoxy resin with wood-grain texture — slow but yields a hard-wearing panel.
- Vacuum-form polymer over a wood master.
For high-fidelity builds, real wood is the only answer.
7.6 Sights
The DL-44 preserves the C96’s tangent rear sight and front blade. Decision space:
- Path A: preserve the existing C96 sights. Don’t modify.
- Path B: kit-built DL-44s usually have the sights cast as part of the frame; Denix replicas preserve the sight cast detail.
- Path C: machine the rear sight notch and front blade as part of the receiver frame work. The rear ramp is a small milled cutout on top of the receiver; the front blade is a small post on top of the barrel.
The sights aren’t a prominent visual feature on the screen prop — they don’t need extraordinary detail.
7.7 Trigger / hammer / internal action
The screen prop’s trigger and hammer are preserved C96 internals — they pivot and (on functional hero pieces) actually drop. For from-scratch builds:
- Trigger blade — small steel pivot piece, returns with a spring.
- Hammer — visible from the side; can be functional (drops when trigger pulled, requires sear linkage) or cosmetic (fixed in place).
- Sear / linkage — needed for functional hammer drop; skip for cosmetic builds.
For the recommended-defaults Path C build, trigger pivots with a return spring; hammer is fixed in the “cocked” position visible from the side; no functional sear linkage.
7.8 Magazine box
The DL-44 preserves the C96’s integral magazine box ahead of the trigger guard. For from-scratch:
- Machined from billet as part of the frame work.
- Sheet metal box brazed / welded separately and attached.
- 3D-printed cosmetic for budget builds.
The magazine box doesn’t need to function (no actual cartridge loading needed). Cosmetic only.
7.9 Secondary detail greeblies
The DL-44 has a few smaller visible details:
- Small switches / studs on the rear of the receiver — Star Wars prop-greebliness, no specific real-world reference. Source from electronics surplus (small toggle switches, slide switches) or fabricate from rod stock.
- A small lever or stud on the side of the frame — varies by piece; some references show two small studs.
- Rivet or screw heads at specific positions — visible from the side; can be added with cosmetic fasteners.
These don’t significantly affect screen-recognition — get the four primary sub-assemblies right (frame, scope, flash hider, grips) and the prop reads as DL-44 even without the secondary details.
7.10 Mixing build paths — sub-assembly hybrids
Some of the best DL-44 builds mix paths at the sub-assembly level. Examples:
- Path B base + Path C sub-assemblies: Denix donor frame, custom CNC-machined scope mount and flash hider, custom CNC-cut grips. The frame is the cheap part; the sub-assemblies get the lab’s attention.
- Path A base + Path C sub-assemblies: Real C96 donor, custom CNC-machined scope mount, custom-machined flash hider. The donor is preserved authentically; the prop additions are first-class.
- Path A base + bought scope: Real C96 donor + real Ziel-Dialyt scope + machined other parts. The two highest-fidelity components are sourced as period originals; the rest is fabricated.
This is encouraged. A “pure Path X” build is rare; most builders blend paths at the sub-assembly level. Document the mixing in builds/{build-slug}/README.md.
7.11 References (Vol 7)
- Hensoldt-Wetzlar production records (where available) — German manufacturer history references.
- Walter Schmid, System Mauser — C96 grip frame and trigger dimensions.
- Replica Prop Forum (RPF) DL-44 dimension threads — multiple sub-threads on individual sub-assemblies (scope thread, flash hider debate thread, scope mount thread, grips thread).
- IMA-USA (International Military Antiques) catalog — surplus muzzle hardware availability.
- Numrich Gun Parts catalog — C96 replacement grip panels.
- 6061-T6 aluminum machinability and finishing references — Aluminum Association.
- Modern reproduction-scope makers (community-active vendors; check RPF for current).